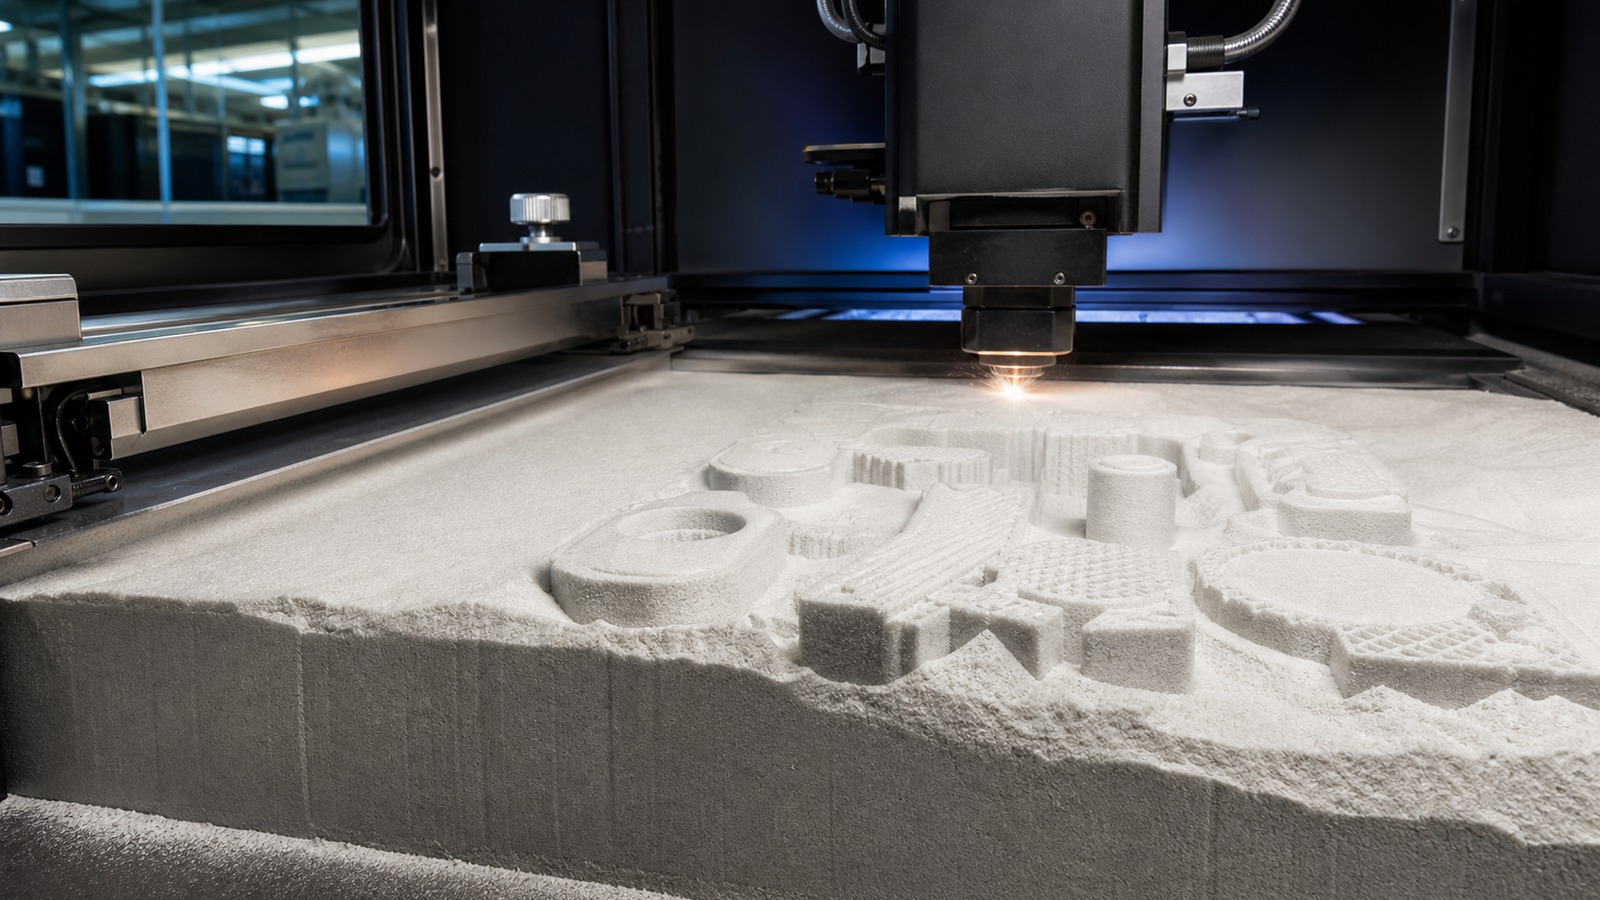
How SLS 3D Printing Works Step-by-Step deserves a focused explanation because process walkthrough changes how engineers, buyers, and students evaluating powder-bed printing make practical 3D printing decisions. The useful lens is a build chamber where a laser fuses nylon powder one thin layer at a time, not a generic promise that every printer can make every part. This guide follows CAD files, powder cartridges, recoaters, build trays, laser paths, cooling bins, depowdering tools, and bead-blasted parts and shows how part strength, dimensional stability, surface texture, powder refresh ratio, and build yield shape the result a person actually sees.
A: It explains How SLS 3D Printing Works Step-by-Step through the actual workflow, materials, and part decisions that shape the result.
A: They should confirm the part's purpose, then choose settings and material around a result that fits the article's purpose.
A: The underestimated step is usually tied to modeling, build preparation, printing, cleanup, inspection, and iteration, especially the preparation and cleanup around it.
A: Because printing material, support material, and finished part surfaces can change strength, texture, cost, handling, and finishing options.
A: Use examples such as prototypes, fixtures, sample parts, and production tests because they show the practical tradeoffs clearly.
A: The biggest avoidable mistake is letting the workflow drift away from the actual part.
A: Judge it by whether it answers a specific question about a result that fits the article's purpose, not by whether it merely looks impressive.
A: Revise after measuring fit, finish, handling, or function against the article's real goal.
A: They should document material, orientation, settings, finishing, inspection notes, and why each How SLS 3D Printing Works Step-by-Step change was made.
A: For 3D printing readers, the best print is the one that makes the next decision clearer.
Start With the Real Job Behind Process Walkthrough
The first question is not whether the subject sounds advanced; it is what job the printed part must perform in a build chamber where a laser fuses nylon powder one thin layer at a time. For engineers, buyers, and students evaluating powder-bed printing, the job may be a faster design answer, a stronger functional part, a better fit, or a clearer purchasing decision. Keeping that job visible prevents focusing only on the laser and overlooking powder handling, packing density, and cooldown time.
A practical brief for process walkthrough should name the part, the user, the environment, and the evidence that will prove success. In this topic, that evidence usually includes part strength, dimensional stability, surface texture, powder refresh ratio, and build yield. Without those process walkthrough details, even an attractive How SLS 3D Printing Works Step-by-Step print can become an expensive guess.
How the Process Walkthrough Workflow Looks Before the Machine Runs
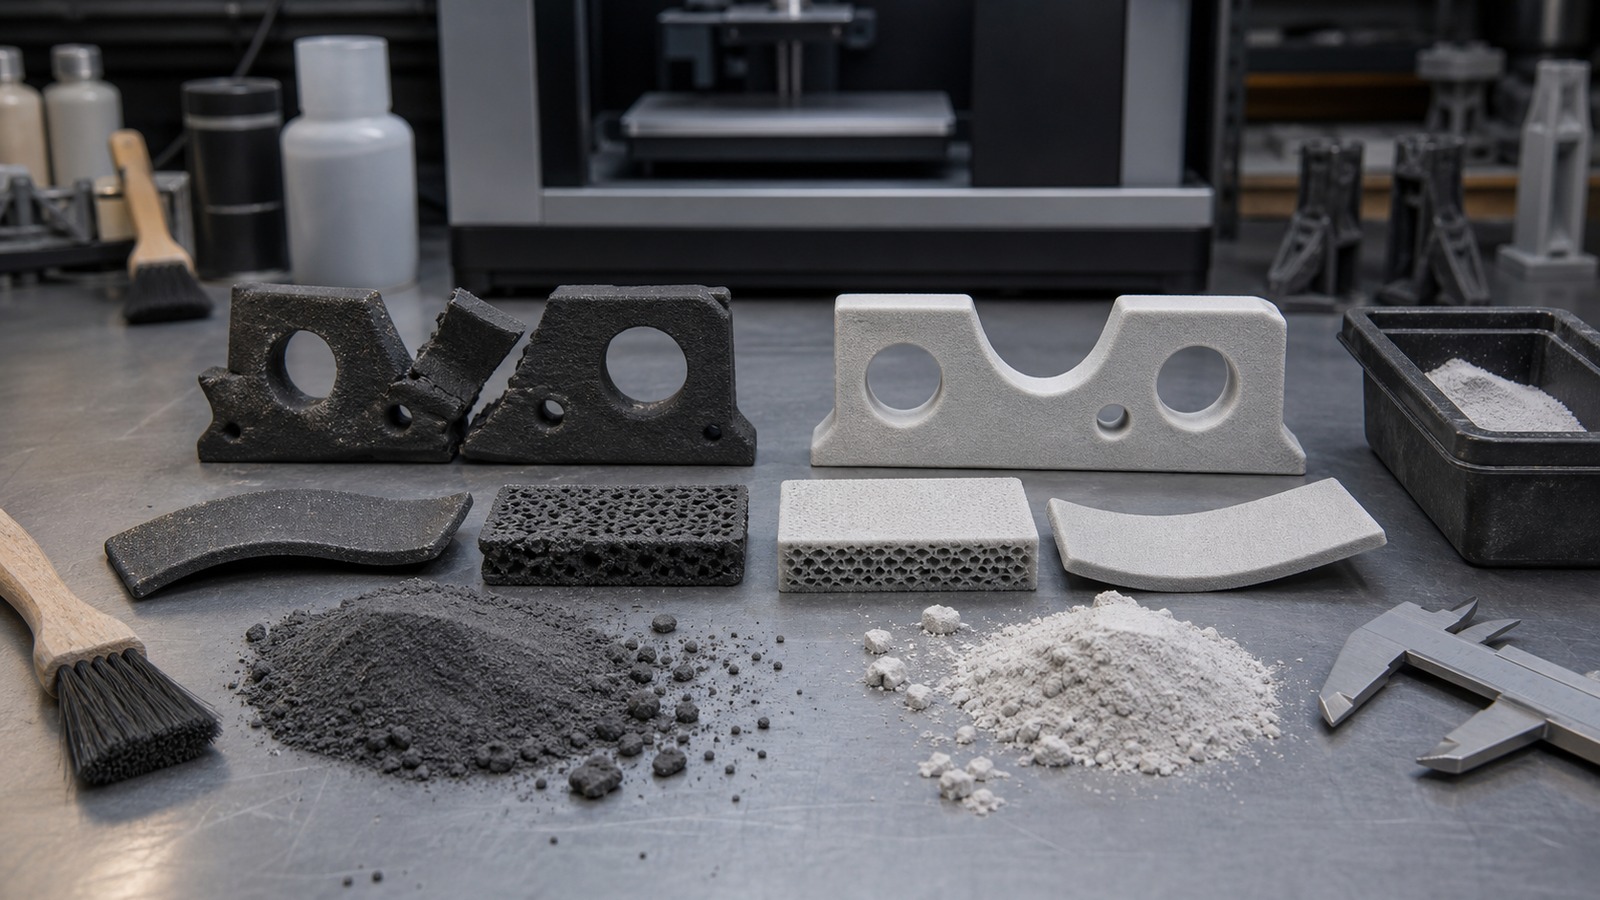
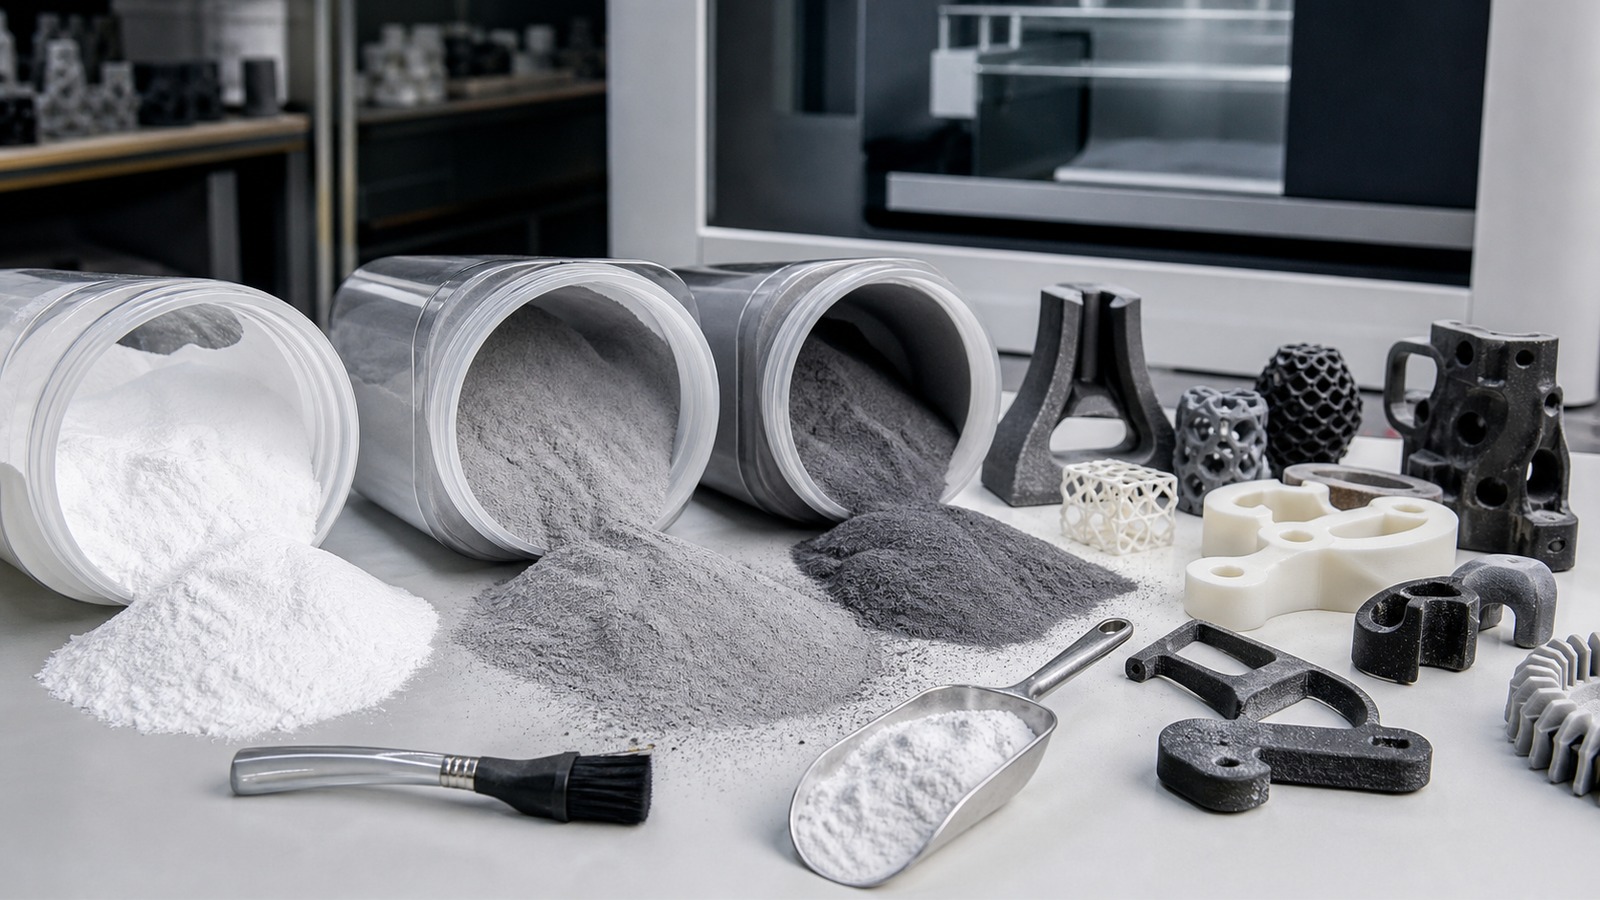
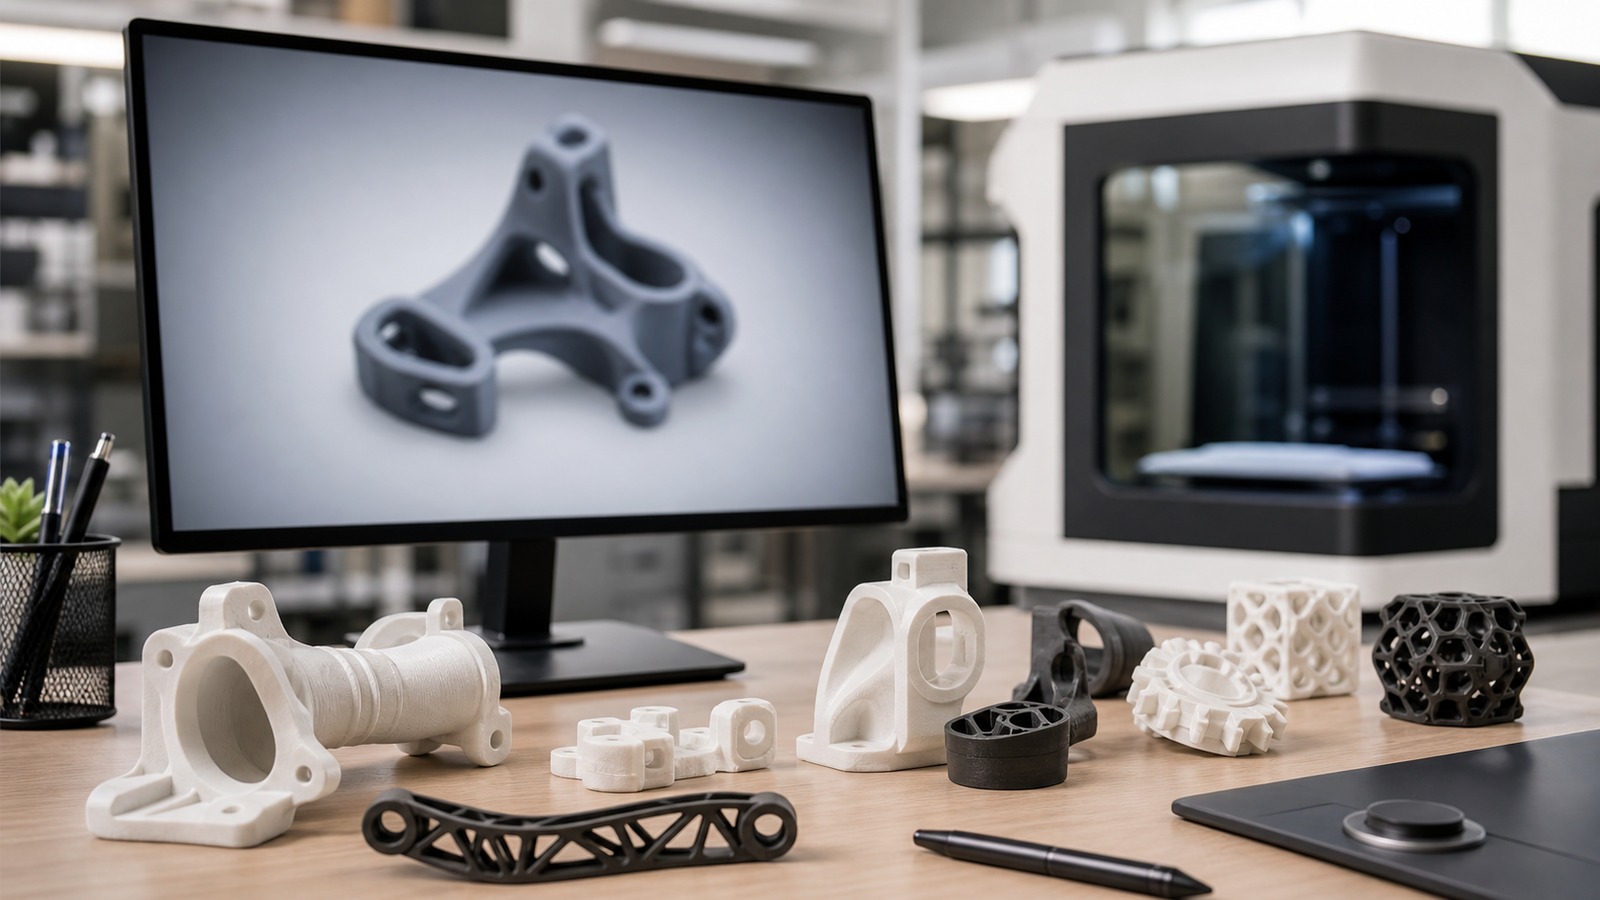
Most process walkthrough outcomes are decided while the work is still digital. The model, orientation, nesting plan, material choice, and finishing expectations have to fit together before CAD files, powder cartridges, recoaters, build trays, laser paths, cooling bins, depowdering tools, and bead-blasted parts move into production. That is especially true when PA12, PA11, glass-filled nylon, TPU powder, refresh powder, and unsintered support powder react differently to heat, handling, and cleanup.
A good process walkthrough pre-print review asks whether geometry can be cleaned, measured, assembled, and revised. The strongest How SLS 3D Printing Works Step-by-Step projects also record assumptions so the next build does not repeat the same uncertainty. That habit is small, but it turns whether every stage from nesting to cooling explains the final part quality into a deliberate engineering check.
The Design Choices That Change Process Walkthrough Results
Design for process walkthrough is less about making something unusual and more about making the right tradeoffs visible. Wall thickness, radii, clearances, escape paths, and surface orientation affect part strength, dimensional stability, surface texture, powder refresh ratio, and build yield. A clean CAD model for How SLS 3D Printing Works Step-by-Step gives the printer fewer opportunities to amplify a weak decision.
The best process walkthrough designs also respect the life of the part after printing. If the process walkthrough part will be handled, flexed, painted, fastened, or inspected, those downstream steps belong in the design conversation for engineers, buyers, and students evaluating powder-bed printing. A nested tray of brackets, clips, and housings leaving the powder cake after a controlled cooldown is a good reminder that the printed object is only useful when it answers a real use case.
Materials and Process Limits in Process Walkthrough
Materials are not interchangeable labels in process walkthrough. Pa12, pa11, glass-filled nylon, tpu powder, refresh powder, and unsintered support powder each bring different behavior in strength, surface feel, cleanup, temperature response, and cost. The right process walkthrough material choice depends on the part's job rather than the powder, resin, or filament that happens to be available first.
Process limits also matter because a process walkthrough machine is building a physical object, not just displaying a digital file. Heat, powder age, resin exposure, support contact, layer strategy, and finishing chemistry all leave marks on How SLS 3D Printing Works Step-by-Step. A user who understands those limits can decide when SLS is worth the setup compared with FDM, resin, MJF, machining, or molding with fewer surprises.
What Beginners Often Misread About Process Walkthrough
Beginners often judge a process walkthrough print too early. A How SLS 3D Printing Works Step-by-Step part may look successful in the build chamber and still fail because a hole is tight, a clip is brittle, a surface is rough, or a cleaning step damages detail. In process walkthrough, the complete result includes preparation, printing, post-processing, inspection, and use.
The opposite mistake in How SLS 3D Printing Works Step-by-Step is rejecting a rough-looking prototype that answered the important question. Early process walkthrough prints are valuable when they reveal fit, motion, ergonomics, assembly order, or failure points. The goal for engineers, buyers, and students evaluating powder-bed printing is not perfection on the first attempt; it is learning fast without confusing activity for progress.
How Professionals Judge Process Walkthrough Success
Professionals usually separate visual quality from functional quality. In process walkthrough, they check whether critical dimensions are stable, whether the material supports the load, and whether finishing changed anything important. For this topic, the strongest inspection plan watches part strength, dimensional stability, surface texture, powder refresh ratio, and build yield.
Documentation is part of that process walkthrough judgment. Build notes for process walkthrough, material batches, orientation choices, cleaning methods, and measured results make a second success easier to repeat. That repeatability is what turns whether every stage from nesting to cooling explains the final part quality from a one-time experiment into a usable workflow.
A Real Process Walkthrough Tradeoff
Consider a nested tray of brackets, clips, and housings leaving the powder cake after a controlled cooldown. The obvious process walkthrough goal is to make the object, but the better goal is to learn whether the object behaves correctly in context. That may mean changing a radius, choosing a different material, adjusting orientation, or accepting a finish that supports How SLS 3D Printing Works Step-by-Step over appearance.
This process walkthrough example also shows why blanket advice is risky. A choice that helps one How SLS 3D Printing Works Step-by-Step print can hurt another if the load case, material, quantity, or customer expectation changes. Good How SLS 3D Printing Works Step-by-Step decisions stay attached to the specific problem rather than floating as generic 3D printing rules.
Cost, Time, and Risk for Process Walkthrough
Cost in process walkthrough is not only the material trapped inside the part. For How SLS 3D Printing Works Step-by-Step, it includes setup, machine time, failed attempts, labor, post-processing, inspection, shipping, and the cost of waiting for answers. That is why when SLS is worth the setup compared with FDM, resin, MJF, machining, or molding should be judged against the whole project, not a single line item.
Time has the same hidden layers in process walkthrough. A fast process walkthrough print can still be slow if cleanup is painful, while a slower build can be efficient if it produces a packed tray of usable parts. The practical winner for How SLS 3D Printing Works Step-by-Step is the workflow that gets trustworthy information or usable components with the least avoidable rework.
Questions to Ask Before Committing to Process Walkthrough
Before committing to a process walkthrough method, ask what the part must prove, who will handle it, and what environment it will face. Ask whether PA12, PA11, glass-filled nylon, TPU powder, refresh powder, and unsintered support powder support that environment and whether CAD files, powder cartridges, recoaters, build trays, laser paths, cooling bins, depowdering tools, and bead-blasted parts can be finished without damaging the feature that matters most. Then ask how the process walkthrough result will be measured.
A second set of How SLS 3D Printing Works Step-by-Step questions belongs to scale. Will the How SLS 3D Printing Works Step-by-Step project need one part, ten parts, hundreds, or a design that changes every week? Those process walkthrough answers often decide whether the best path is direct printing, outsourced production, tooling, or another manufacturing method.
Where Process Walkthrough Is Heading Next
The next stage for this topic is not simply faster machines. It is a more connected process walkthrough workflow where software, materials, safety, inspection, and finishing all support better decisions. Watch for better thermal control, more material choices, cleaner depowdering, and tighter production monitoring.
That process walkthrough future still depends on clear thinking at the part level. A printer cannot rescue a vague process walkthrough requirement, and a premium material cannot fix a design that ignores use. The durable advantage comes from matching printing, works, step, process, walkthrough, files, powder, cartridges, recoaters to a specific problem and then measuring the result honestly.
The Practical Takeaway for How SLS 3D Printing Works Step-by-Step
The most useful conclusion is that How SLS 3D Printing Works Step-by-Step should be approached as a decision framework, not a slogan. Define the process walkthrough purpose, choose the material and process around that purpose, and judge the part by evidence from the real workflow. When engineers, buyers, and students evaluating powder-bed printing do that, 3D printing becomes less mysterious and much more useful.
One more practical habit for How SLS 3D Printing Works Step-by-Step is to keep a short build note tied to the part. Record the process walkthrough material, the feature that mattered most, the measurement that passed or failed, and the next change suggested by the result. For How SLS 3D Printing Works Step-by-Step, that note should mention whether every stage from nesting to cooling explains the final part quality and the keywords printing, works, step, process, walkthrough, files.
One more practical habit for How SLS 3D Printing Works Step-by-Step is to keep a short build note tied to the part. Record the process walkthrough material, the feature that mattered most, the measurement that passed or failed, and the next change suggested by the result. For How SLS 3D Printing Works Step-by-Step, that note should mention whether every stage from nesting to cooling explains the final part quality and the keywords printing, works, step, process, walkthrough, files.
One more practical habit for How SLS 3D Printing Works Step-by-Step is to keep a short build note tied to the part. Record the process walkthrough material, the feature that mattered most, the measurement that passed or failed, and the next change suggested by the result. For How SLS 3D Printing Works Step-by-Step, that note should mention whether every stage from nesting to cooling explains the final part quality and the keywords printing, works, step, process, walkthrough, files.
One more practical habit for How SLS 3D Printing Works Step-by-Step is to keep a short build note tied to the part. Record the process walkthrough material, the feature that mattered most, the measurement that passed or failed, and the next change suggested by the result. For How SLS 3D Printing Works Step-by-Step, that note should mention whether every stage from nesting to cooling explains the final part quality and the keywords printing, works, step, process, walkthrough, files.