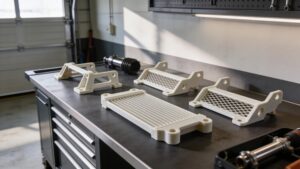
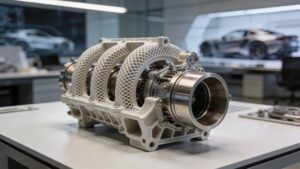
Welcome to Automotive & Transportation on 3D Printing Street—where road-ready ideas go from sketch to shop floor with a few daring layers. Here you’ll see how additive manufacturing reshapes vehicles, from lightweight brackets and airflow-tuned ducts to rugged jigs, fixtures, and end-use parts built for heat, vibration, and miles of real-world punishment. We follow the full journey: picking materials that handle under-hood temps, setting orientation for strength, building in proper tolerances, and finishing surfaces that look and perform like they belong on the road. This category is your pit lane for innovation—rapid prototyping for styling and ergonomics, custom interior upgrades, motorsport parts, EV cable routing aids, tooling for assembly lines, and on-demand spares that cut downtime. Whether you’re a weekend maker or an engineering pro, you’ll find practical guides, inspiring builds, and smart design tricks that keep projects moving forward—faster, lighter, and built to last. Expect clear breakdowns of FDM, SLA, and SLS choices, failure modes to avoid, and real shop tactics for testing fit, load, and heat before you commit to production every time.
A: FDM for durable prototypes and tools; move to SLS/metal when you need tougher production-grade behavior.
A: Some can—choose higher-temp materials and design for airflow, shielding, and realistic stress.
A: Likely vibration + sharp corners + poor layer direction—add fillets/ribs and rotate the print to match loads.
A: Use heat-set inserts or captured nuts for repeated service and proper torque.
A: Not always—smart wall thickness + ribs often beats “solid” with less weight and fewer print issues.
A: Calibrate, design clearances, and print small test sections before committing to the full part.
A: Sand + seal, or use a compatible smoothing method for the material to reduce turbulence and grime.
A: Treat those as engineering projects—use validated materials, testing, and standards; many makers keep prints to non-critical components.
A: Use an enclosure, stable bed temps, proper adhesion, and split the design with alignment features if needed.
A: A custom jig/fixture, clip replacement, or interior organizer—high impact with low risk and fast learning.